UITableView and all the types and structures evolving around it are the bread and butter of every iOS developer. And while the introduction of UICollectionView back in iOS 6 (8 years ago!) challenged the sole reign of UITableView as king of content views on iOS, lots and lots of popular apps out there still use it as the backbone of their UI. Twitter, Instagram, WhatsApp, the stock Mail app (lol), to name a few.
The API is – once you grasped the concept of indexPaths and cell reuse – fairly simple, yet remarkably powerful when it comes to versatility and efficiency.
For this post, I don’t want to bore you with yet another How to use UITableView or UITableView for beginners – this has been done plenty of times before by people who are much more eloquent than me. Instead, I want to explore a little hidden gem within the API of UITableView, which has been the cause for probably quite a few posts on StackOverflow:
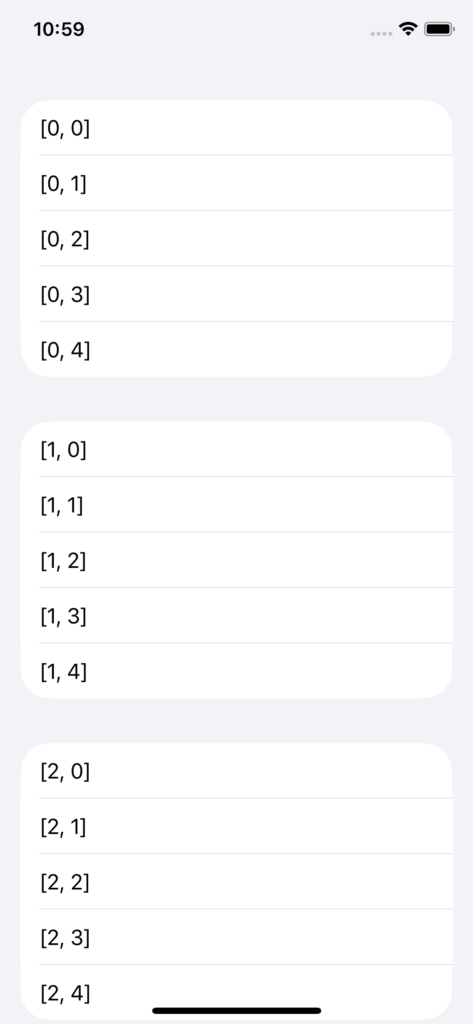
How do you make a table view look like the one in the Settings app on iPad?
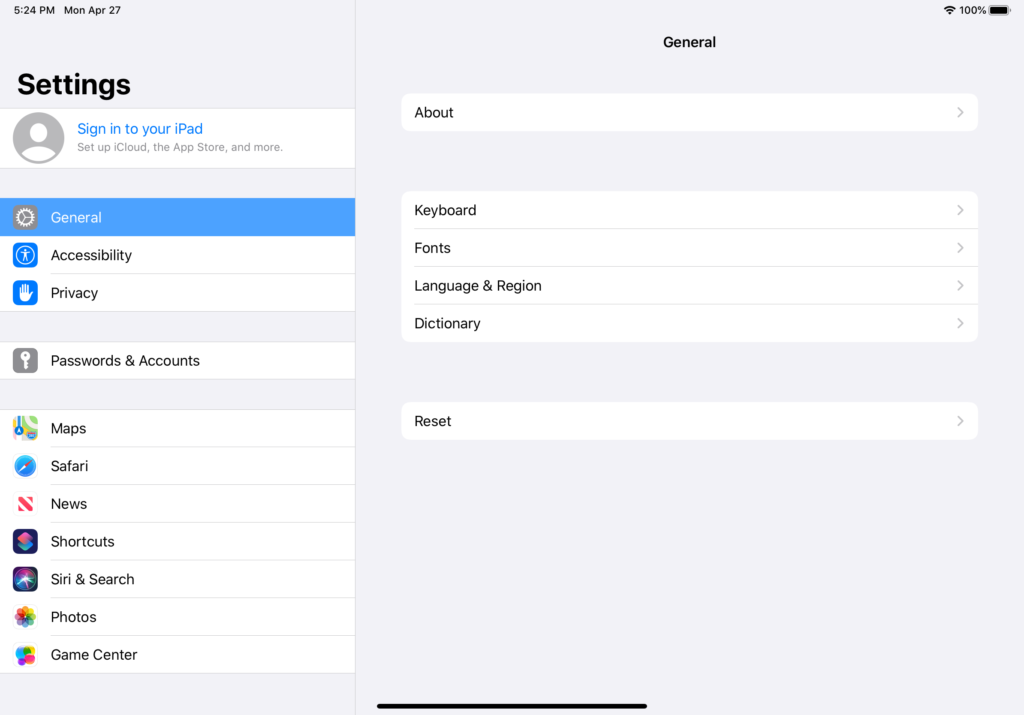
Well, if you life in a world where supporting only the latest major iOS version works for you, it’s as easy as this:
override func loadView() {
  view = UITableView(frame: .zero, style: .insetGrouped)
}
But what about supporting versions below iOS13 while still maintaining that sleek inset table view look?
It’s similarly easy, albeit much less discoverable or, if you will, official.
tableView.setValue(true, forKeyPath: "sectionContentInsetFollowsLayoutMargins")With that little piece of code, you will be able to rock the insetGrouped style all the way back to iOS11 (possibly further, I didn’t have the patience to download old versions of Xcode and simulator runtimes to check).
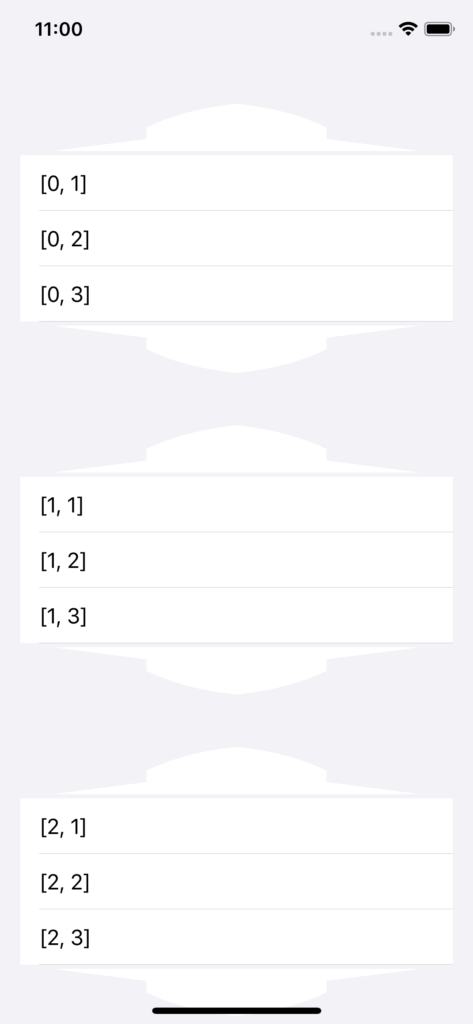
Radius gone crazy
You can also manipulate the corner Radius of the sections:
tableView.setValue(24, forKeyPath: "sectionCornerRadius")This might me useful or completely crazy. It’s probably best to keep the radius at its default value of 10pt.